Species Iris Group of North America
Publications* ⚜ Species Database ⚜ Spec-X ⚜ IOTM | ||||||
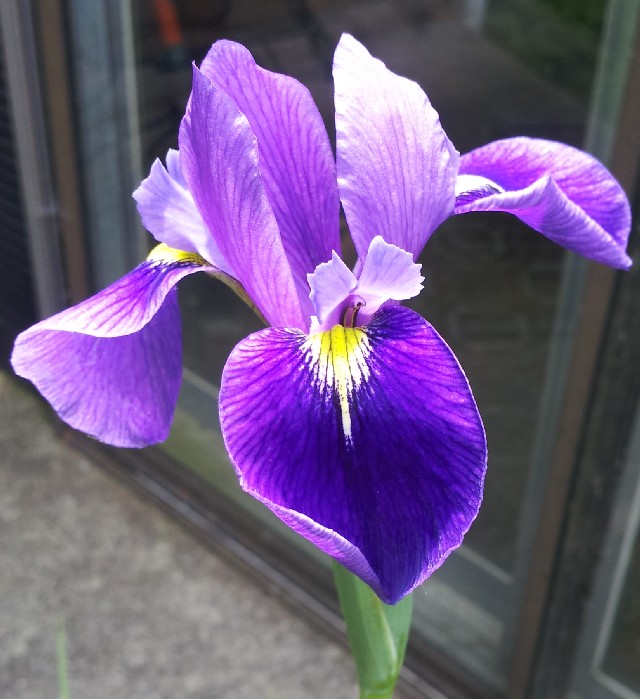
Here are some examples of Iris grown from SIGNA seed.
Starting Iris Seed A New Season for the SIGNA Seed Exchange by Will Plotner With the SIGNA Seed Exchange in full swing reminding us of the joy of seeing a new iris starting from seed and with many questions coming in about how to get them started, It is time to offer some Stout advise on the process. There are many different methods of starting seed, from the very mundane (put it in the ground) to very exotic ways with surgical tools. Looking back through the many different articles on the subject I find one to be the most useful for the broadest spectrum of Iris Seeds. Over twenty years ago Florence Stout wrote a twelve-step article in SIGNA on the process and we present that article here to help get your seeds started. Step By Step With Stout Some thoughts about starting Iris from seed by Florence Stout 1. First of all, make a list in a notebook of all the seeds you have received from SIGNA, using the numbers assigned in the original list for later reference. Put down as much information as you have about each item, and leave some space to add more information as you learn it. Look up on the list where each item came from (listed on the front page of coded donors.) I do not order seeds that were grown in an area radically different from mine if there is a choice. 2. Prepare labels for each packet at this time, being careful to use a waterproof pen or wax pencil. My labels are usually pylon, a hard plastic with a hole at one end through which I thread a 6 to 8 inch piece of single strand telephone wire. But plastic knives will do to write the name and numbers on though youll need separate string or wire for fastening together. Rubber bands will not suffice. 3. Most seeds need to be soaked in distilled water for at least an hour because they are over-ripened. This process is simple. I use separate containers (like Jar Lids) for each packet. Lay the label you have just made for this item over the lid of soaking seeds so you wont get mixed up. Do each this way. (I use the kitchen table for this work) 4. While the seeds are soaking, mix a quantity of peat moss, sand or vermiculite with enough water to dampen but not be soggy. Provide yourself with a box of cheap, plain sandwich bags. Now pick up a bit of wet moss (or sand & vermiculite) about the size of a walnut and make it into a ball which you hold in the palm of your hand. With the other hand poke a hole halfway down in the center. Take the seeds from your first packet and put them into this hole and close it up again. This ball with the seeds neatly enclosed in the wet moss (sand or vermiculite) is then carefully placed inside a plastic sandwich bag in one corner. Now twist the wire on your label around the enclosed ball. If you are using plastic knives you will obviously have to tie each in place with string or wire (rubber bands will deteriorate). You have now processed your first package of seed so they can be Stratified in the vegetable crisper of your refrigerator. Continue putting each kind of seed in its own ball of wet moss (or sand or vermiculite), labeling correctly, and store them (at least 3 weeks, better 5 weeks) in the crisper of your refrigerator. 5. Stratification of your seeds may be new to you, but it is important even if you intend to plant outdoors when weather permits instead of growing under lights. Heat and dryness kill seeds, so do the way the experts do and your percentage of germination will be high. The seeds that are stratified can remain safely in a vegetable crisper for a long time, at least until all danger of frost is past in your area. When you plant outdoors, the main thing to remember is to keep seed and seedlings moist. A one half inch of fine moss over the seeds planted in rows identified with the same markers will help to keep them moist but not soggy. Some people place a plate of glass over the seeds until they sprout. A board would do if you remove it as soon as the sprout (at least 8 days). 6. If you cant wait until all danger of frost is past youll need to provide a suitable environment indoors. You do not need a greenhouse. Select a sunny window in a room suitable for human occupation and with the addition of fluorescent lights hung over your treasures, you can do fine. You can plant each ball containing seeds in a separate 4 plastic pot filed 2/3 full with either a commercial potting mix or a mix of your own. They do not need fertilizer so a mix of half peat moss and half vermiculite will do. Fit a plastic sandwich bag over the top of the pot, snugly. As plants grow, gently increase the head room for growth, never taking the plastic off (you water from below). So now each group of seeds has its own little controlled environment. No drying out, and no damp-off! 7. In providing adequate light, I have never found just a window sill and natural light enough in our climate, but you may be able to do that where you live. I use fluorescent lights with reflectors. Grow-Lux and Agri-Grow are lights especially made for growing plants under lights. I start out with the lights 6 to 8 inches above the seeds, but raise them as needed. 8. Always water your pots from underneath (the moss acts like a wick). Keep the tops enclosed. If the trays you set your pots in do not have grooves for air and drainage, put some marbles or gravel under them. This drainage tray needs to be set in another tray to protect your table or window seat. I use boot mats for this because they are handy, cheap and have a rim around as if made for this purpose! 9. There is a wide variation in germination time. How cold the room is seems to matter, and the type of seed will determine how fast it sprouts, Arils being probably the slowest. It may happen sometime that you will need to keep your seed post over another season if yu want to get all possible plants. If you have kept track of how many seeds you planted you will know if they have all germinated, or as many as you want. 10. I have not mentioned how deep to plant the seeds and this varies with the type of seed. Most need ½ of milled moss over them, but versicolor, louisianas, or pseudacorus, all large seeds, would find this too shallow. When transplanting to their outdoor garden row, the roots must be accommodated as deep as they have extended with at least a half inch of soil over the crown. As they grow they will seek a deeper or shallower space. A little dilute fertilizer solution can be given not oftener than once a month when first sprouted, then once a week, continuing until well established. I use soluable fertilizer with a low first number. 11. By now you will have read about the types you have in back issues of SIGNA and made additional notes in your notebook including what you did and how, how much and when, your results and comments for yourself and for sharing. Its a great project and you can be as scientific as your nature allows! This is how Mendel started. 12. If your list of Iris seeds contains members of the ensatae group (Japanese) you will need to test your soil to be sure it is acid enough for them, for they can not withstand soils with lime in them. You may need to add Miracid or other acid fertilizer or soil sulfur when you transplant them to their permanent home. Most iris will tolerate a neutral soil, though spurias in general like alkalinity, as do most of the bearded iris. If you have a wide variety of types you will want to find our their different requirements. Once established you will enjoy them all with new appreciation. I think enervone should get their soil tested by their county agricultural agent or buy a kit and learn to do the soil test yourself. Misc.: Cristata have the tendency to grow out of the soil and appreciate a handful of moist moss thrown on them once in a while. Also its easy to mistake their little stolons (surface roots) for sticks to be cleaned off! On a hot summer day they like a sudden rain, but not the junos. They hate our heave summer rains when they want to go dormant as in their native land. So give them unusually sharp drainage and protection from the summer deluge. Mine do well under a ginkgo tree which leafs out late and shelters them from the later heavy rains while they sleep. They always return on schedule in early spring. Air circulation is important to ALL iris plants so be sure to keep them well weeded. They must be spaced far enough apart for the same reason. Dont be tempted to plant other plants over their roots either. | ||||||
|
© 2024, SIGNA.
For general inquiries about SIGNA please contact Rodney Barton.
Please report technical problems to dkramb@gmail.com.
|
||||||